
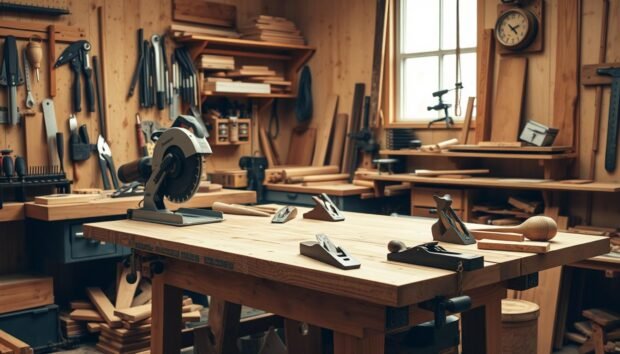

Here’s a mistake I see constantly with people buying woodworking tools. Someone gets excited about woodworking, and the first thing they buy is a table saw. Not a chisel, not a hand saw — a table saw. Eight hundred dollars later, they still don’t know how to square a board, and the saw just sits there collecting sawdust from other people’s projects.
So this guide isn’t going to be another giant list of fifty woodworking tools thrown at you at once. It’s split by skill level and budget, because the woodworking tools a total beginner needs and what someone building their fifth cabinet needs are two very different shopping lists. There’s also a section on safety that actually names the specific ways people get hurt with each tool, instead of the usual “wear safety glasses” and nothing else. And a maintenance guide, because half the “broken” tools people complain about just needed cleaning.
How to se This Guide
Never built anything before? Start at Beginner Essentials, don’t skip it just because it looks basic. Already own the hand tools and wondering what to add next? Head to the power tools section. Tight on cash? There’s a budget breakdown further down. Living somewhere without a garage? Read the small-space section before you buy anything bulky.
And honestly, just one rule matters more than the rest: buy for the project sitting in front of you right now. Not the shop you picture yourself having in three years.
Not sure what that first project should even be? Our DIY wood pallet projects guide has ten beginner-friendly builds that only need the basic tools listed below — a good place to start once you’ve got your kit together.
Beginner Woodworking Tools Essentials
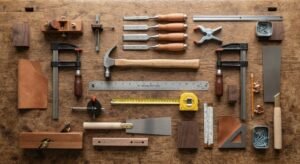
None of these woodworking tools need a dedicated workshop. A spare table works fine.
Start with a set of chisels — four to six of them. You’ll use these constantly, cleaning out joints, trimming edges, shaping little details a saw can’t handle. A basic set runs about $25. Go up to $60 and you get better steel; premium forged sets pass $150, though you don’t need that yet.
You need a claw hammer too, obviously. Something 16 to 20 oz that feels right in your hand. Fifteen to thirty dollars covers most people.
A tape measure — get one that extends to at least 25 feet, and actually check that the hook doesn’t wobble before you buy it. A loose hook throws your measurements off more than people expect, sometimes by an eighth of an inch, which adds up fast on a bigger project. Eight to fifteen dollars gets you something decent.
Hand saw, for the cuts where firing up a power tool feels excessive. A basic crosscut saw, fifteen to thirty-five bucks, handles most early projects fine.
Screwdrivers — mix of flathead and Phillips, plus one stubby one for tight corners you can’t reach otherwise.
Clamps. Get at least four. There’s an old line among woodworkers that you can never own too many clamps, and it’s not really a joke, it’s just true. Quick-grip and C-clamps, mixed, around twenty dollars for four cheap ones.
A layout square for marking 90-degree angles — buy the metal one, not plastic. Plastic warps within a year and then it’s useless for anything precise.
A level, 24 inches is plenty for small stuff.
Utility knife, for scoring wood and cleaning up joint lines.
And safety glasses. Buy these before your first cut. Not after.
What to skip for now: table saw, router, planer, jointer. These are powerful, expensive, and genuinely dangerous if you haven’t developed a feel for how wood behaves yet. I’ve seen too many beginners buy the power tools first, ruin a stack of boards, and occasionally end up in urgent care. There’s no rush.
Woodworking Tools Comparison Table
Here’s a quick-scan breakdown of every tool covered in this guide — what each one is best for, what skill level it suits, and roughly what it costs.
| Tool | Best For | Skill Level | Price Range | Corded/Cordless |
|---|---|---|---|---|
| Chisel Set | Joint cleanup, shaping | Beginner | $25–150 | N/A |
| Claw Hammer | Nailing, assembly | Beginner | $15–60 | N/A |
| Hand Saw | Simple manual cuts | Beginner | $15–70 | N/A |
| Clamps | Gluing, holding joints | Beginner | $20–100+ | N/A |
| Power Drill | Drilling, driving screws | Beginner–Intermediate | $40–150 | Both |
| Circular Saw | Straight cuts, sheet goods | Intermediate | $60–200 | Both |
| Jigsaw | Curved and pattern cuts | Intermediate | $50–150 | Both |
| Random Orbital Sander | Smooth finishing | Intermediate | $40–120 | Both |
| Router | Edge shaping, grooves | Intermediate–Advanced | $80–300 | Both |
| Table Saw | Precision rip/crosscuts | Advanced | $300–1,500+ | Corded only |
| Miter Saw | Angled and trim cuts | Advanced | $150–500 | Both |
| Jointer | Flattening board edges | Advanced | $200–800 | Corded only |
| Planer | Thicknessing boards | Advanced | $200–700 | Corded only |
| Band Saw | Curves, resawing | Advanced | $250–1,200 | Corded only |
Power Tools You’ll Eventually Need
The power drill usually comes first, and it’s the tool you’ll actually reach for the most, more than anything flashier. Cordless ones are easier to move around a small shop; corded ones just don’t run out of juice halfway through a job. A lot of people start with cordless and pick up a corded one down the line once they’re doing heavier work.
After that, most people grab a circular saw. It cuts straight through boards and sheet goods without needing the space (or the money) a table saw demands. Cutting down a full sheet of plywood on your own is a lot easier with one of these than you’d think.
A jigsaw is next on most lists, mainly because it does the one thing a straight saw can’t — curves. Anything decorative, anything irregular, this is the tool.
Then a random orbital sander, because at some point every project needs to actually look finished instead of just built. It moves in a random pattern specifically so it doesn’t leave those little swirl marks a cheaper sander will. Once the sanding’s done, picking the right finish matters just as much — our wood finishes guide breaks down oil, varnish, wax, and lacquer so you know which one actually suits your project.
The router shapes edges and cuts grooves and does the decorative work that makes a project look intentional rather than just functional. Get one with at least 2 horsepower — underpowered routers bog down in hardwood and burn through bits fast, which gets expensive.
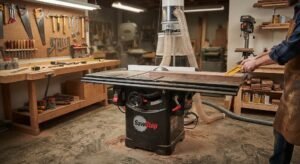
Eventually, if you’re serious about this, you’ll want a table saw. It’s usually the single biggest purchase in a home shop, and for good reason — it’s the one tool that handles precise, repeatable rip and crosscuts better than anything else you own.
A miter saw pairs naturally with it for angled cuts, trim work, picture frames, that kind of thing.
Jointer and planer come as a pair, and you genuinely don’t need either until you start working with rough, unmilled lumber. The jointer flattens one edge; the planer brings the rest of the board to a consistent thickness.
Last on most people’s list is a band saw — good for curves, resawing thick stock into thinner pieces, and a handful of cuts nothing else in your shop can really do.
Quick note on cordless versus corded, since people ask constantly: cordless wins on mobility, no cord to trip over or drag across the shop. Corded wins on raw, sustained power. Drills and drivers are fine cordless. Anything that needs steady power through a longer cut — table saws, jointers, planers — you’ll almost always want corded.
Budget Breakdown by Shop Stage
Starter shop, roughly $200 to $500. This is all ten beginner hand tools plus a basic power drill. Enough for small shelves, boxes, simple repairs.
Intermediate shop, $1,000 to $3,000. Add a circular saw, jigsaw, orbital sander, router, and either a compact table saw or a track saw. Honestly, most home furniture and decor projects live comfortably in this range — you don’t need much more than this.
Full pro shop, $5,000 and up. Cabinet-grade table saw, jointer, planer, band saw, dust collection, a real dedicated bench. This is for people building in small batches or taking it seriously as more than a hobby.
Don’t feel pressure to jump straight to the pro-shop number. Finish a few intermediate projects first. You’ll actually know what you need by then instead of guessing.
Space-Saving Tools
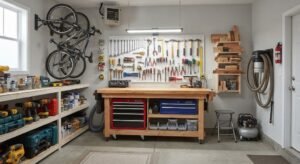
Not everyone’s got a garage. If you’re working out of a spare room or a corner of an apartment, benchtop tools beat floor-standing ones almost every time — a benchtop table saw or drill press takes up a fraction of the space and slides under a bench when you’re done with it.
A track saw can genuinely replace a table saw for a lot of cuts. It’s really just a circular saw riding along a guide rail, but it’s surprisingly accurate, and it stores flat against a wall instead of eating up floor space permanently.
Look for a workbench that folds up. Pegboards and magnetic strips help too — keeps tools within reach without needing extra floor space for storage. And if a few of your tools share the same battery platform, that’s one less charger cluttering things up.
Safety Essentials
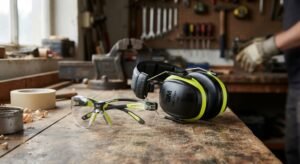
“Wear safety glasses” only covers so much ground. Here’s what actually tends to hurt people, tool by tool.
Table saw: kickback is the big one. It happens when the wood binds against the blade and gets thrown back at you, fast. A riving knife or splitter helps prevent it, and just don’t stand directly in line with the blade, ever.
Router: most injuries happen during bit changes, not while the thing is actually running. Unplug it first. Keep your hands away from the collet when you power it back on.
Miter saw: keep your hands well clear of where the blade travels, and let it come to a complete stop before you lift it back up. People rush this step more than any other.
Band saw: fingers usually get caught during small, detailed cuts, not big ones. Use a push stick for anything under about three inches wide.
Sanders: loose sleeves and long hair near a spinning pad or belt — pretty simple, but it happens.
Basic protective gear worth keeping around: safety glasses, hearing protection for anything with a motor, a dust mask, and skip the loose jewelry near moving parts.
Tool Maintenance and Lifespan
| Tool | Maintenance Task | Frequency |
|---|---|---|
| Saw blades | Clean pitch buildup with blade cleaner | Every 10–15 uses |
| Hand planes/chisels | Sharpen on a whetstone | Before each major project |
| Power drill | Check chuck grip, clean vents | Monthly |
| Table saw table | Wax with car wax (not silicone) | Every few months |
| Clamps | Wipe off glue residue | After each use |
| All power tools | Store away from moisture | Ongoing |
On replacing versus sharpening — carbide-tipped blades can be resharpened several times, so it’s worth maintaining them. Cheap steel blades, not really; sharpening often costs more than just buying a new one. Chisels and plane blades are the opposite case. Always sharpen those instead of replacing them. A sharp thirty-dollar chisel will outcut a dull hundred-and-fifty-dollar one every single time, no contest.
Non-Tool Essentials
A few of the most useful things in a shop aren’t tools at all. A solid workbench, for one — everything else you own depends on having a stable, flat surface to work on. Some kind of storage system, whether that’s pegboards, bins, or a rolling toolbox, just so you can actually find things. A moisture meter, which checks the wood before you build with it and saves you from a warped project down the line. Keep your manuals, too — a surprising number of “broken” tool returns turn out to just be a setup mistake. And don’t rely only on overhead lighting; it casts shadows right where you’re cutting, so add a task light pointed at your actual work surface.
FAQ
What’s the single most important woodworking tool? For most people starting out, it’s a decent set of chisels paired with clamps. Both get used in nearly every project, and neither one needs a power outlet or any real setup time.
How much does it actually cost to start woodworking? Plan on $200 to $500 for a basic starter kit — hand tools plus a power drill. That’s genuinely enough for small furniture and decor projects, more than people expect.
What do I need if I’m working in a small apartment? Stick to benchtop and folding tools. A compact drill, a track saw instead of a full table saw, wall-mounted storage instead of floor shelving. It adds up to a usable little shop even in a tight space.
Cordless or corded, if I’m just starting out? Cordless is fine for a drill or driver, no real downside there. For anything that needs steady power through a longer cut, like a table saw or circular saw, corded is still the more dependable pick.
How often should I actually sharpen my chisels? Before every major project, at minimum. And immediately if you notice the blade tearing the wood instead of slicing through it clean.